In an age of ever-growing digital clutter—spreadsheets, documents, chat threads, sticky notes, scattered bookmarks—many of us struggle just to find what we need. What if you could create one organized place where everything relevant to your work, projects, goals or learning lives? That’s exactly the value of a personal wiki: a self-curated, evolving knowledge base that keeps you organised, aligned and productive.
This post will walk you through what a personal wiki is, why it matters, how to create one (step by step), real-world ways it can help, common challenges you’ll face, and best practices to follow—so you can launch your own and make it sustainable.
What is a Personal Wiki (and why it matters)
A wiki is a digital space where information is created, edited and linked collaboratively. Unlike a static document or folder, a wiki allows you to structure information in pages, sub-pages, and hyperlinks so that related ideas interconnect. While public wikis (like large encyclopaedias) are open to all, a personal wiki is typically restricted—accessible only by you or a defined group.
In simpler terms: a personal wiki is your private knowledge base. It might contain project notes, guidelines, learning logs, client information, reference material, or anything you want to organise and retrieve quickly.
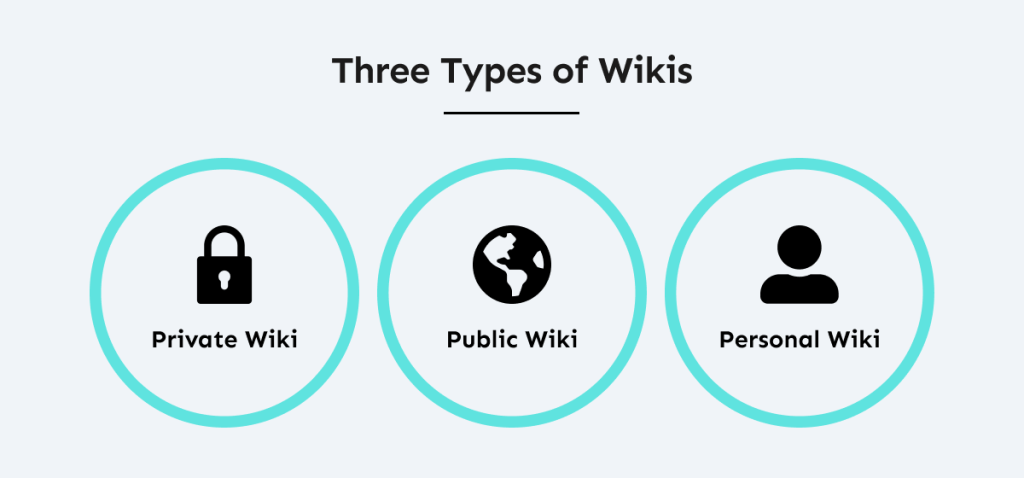
Three broad wiki types exist:
-
Private/personal wiki: One person or a defined team uses it, often with controlled access.
-
Corporate or internal wiki: Organisations set it up to manage internal knowledge bases, SOPs, documentation.
-
Public wiki: Open to the wider world, contributions from anyone; example large open-encyclopedia platforms.
For our purposes, we’ll focus on making a personal or team-private wiki—something you control, tailor, and use as your central knowledge hub.
Key benefits
Here are some of the major reasons to build one:
-
Centralised knowledge: Instead of bits and pieces scattered in documents, spreadsheets, chat threads, bookmarks, you have one place.
-
Linking & structure: Wikis allow you to connect pages (page → page) so that related information stays connected. This is more powerful than folders of isolated files.
-
Improved findability: With the right structure, metadata, search and linking, you save time hunting for stuff.
-
Knowledge retention: Especially in teams, when people leave or projects end, documented information remains.
-
Flexibility: A personal wiki can host anything: project notes, learning logs, client briefs, personal goals, templates, checklists.
-
Scalability: You build once, but keep growing. The repository adapts as you accumulate more knowledge.
If you find that you’re constantly searching for “where did I save that again?”, or you repeat the same onboarding or process explanations, a wiki might be the upgrade.
Choosing the Right Tool for Your Wiki
Because a wiki is only as useful as its usability and your willingness to maintain it, picking a tool that fits your workflow matters a lot. Below are major types/categories + key features + tool examples.
Key features to look for
When evaluating, ensure the platform supports:
-
Real-time or at least easy editing of pages (rich editor / markdown)
-
Page linking (so you can navigate easily)
-
Structure (pages, subpages, hierarchies or tags)
-
Searchability (search box, filters, metadata)
-
Access permissions (who can view/edit) if for a team or private use.
-
Version history (so you can revert if needed)
-
Integrations if you want: attachments, images, maybe embed other content.
-
Scale / growth: ability to reorganize as the wiki expands.
-
Simplicity: If it’s too complex, it may end up unused.
Tool categories and examples
Here are some tool options, from simpler to more advanced/self-hosted:
-
Cloud-based, user-friendly
-
Notion: Very popular for personal wikis and knowledge bases. Provides nested pages, databases, templates.
-
Slite: Designed for private wikis and team knowledge. Offers wiki generators and templates.
-
Nuclino: A “modern” private wiki option with simple UI, linking, collaboration support.
-
-
Open-source / self-hosted (more control, may require more setup)
-
BookStack: Open-source PHP/Laravel wiki with structure “shelves/books/chapters” and good permissions.
-
XWiki: Java-based with enterprise features: structured content, scripting, fine-grained permissions.
-
Zim: Desktop personal wiki (local files) good for individual use rather than team.
-
Depending on your need (solo vs team, private vs public, cloud vs self-hosted) you’ll pick accordingly. For many individuals and small teams, cloud options like Notion/Slite strike a good balance of power + ease.
Building Your Personal Wiki: Step-by-Step
Here’s a detailed walkthrough of how to set up, structure, populate, and maintain your wiki.
Step 1 – Clarify purpose, scope & users
Before you create anything:
-
Ask why: What do you want the wiki to achieve? (e.g., “organise project workflows”, “track personal learning & goals”, “store client data and deliverables”)
-
Define who will use it: Only you? You plus team? External collaborators?
-
Sketch major content domains or buckets: For example:
-
Projects
-
Processes / SOPs
-
Personal development / learning
-
Templates & checklists
-
Reference library (articles, links, resources)
-
-
Establish boundaries: What is not going in the wiki? This helps keep it focused rather than becoming a catch-all mess.
This front-planning prevents you from building a wiki that’s too vague, too sprawling or irrelevant.
Step 2 – Design the structure (information architecture)
A wiki’s usefulness is heavily influenced by how well it’s organised.
Best practices for structuring
-
Use top-level categories/pages as entry points (e.g., Projects, Learning, Operations, Clients)
-
Under each category have sub-pages. Example: Projects → Project A → Kick-off, Timeline, Deliverables
-
Maintain a consistent naming convention: clarity helps retrieval (avoid generic titles like “Misc Notes”)
-
Use page linking liberally: from one page point to related pages (for example a process page may link to a template page)
-
Consider using tags/metadata or table of contents/index pages for cross-cutting topics
-
For teams: establish an ownership model: each page or section has an owner responsible for updates
The idea: you want users (including yourself) to find things intuitively, not dig through nested folders blindly.
Step 3 – Select and set up your tool
Pick one of the tools referenced above (or another that suits you) and perform the initial setup:
-
Create the workspace/site
-
Set up access/permissions: ensure the right people can view/edit appropriately
-
Define templates: For example create a “Meeting Notes” template page, “Project Brief” template, “Process Guide” template — this ensures consistency
-
Set up navigation: perhaps a homepage/dashboard with links to each major category
-
If supported, create permission groups (viewers, editors) and version control settings
Step 4 – Populate content (fill the skeleton)
Now begin adding the pages. Some tips:
-
Start with the most valuable content first: things you access often or want to stabilise (e.g., key processes, active projects)
-
Write pages with good readability: use headings, bullet lists, tables, images/diagrams where helpful
-
Use internal links liberally. If a page mentions another topic, link it so someone can navigate rather than just search.
-
Use templates: e.g., every “Project” page might follow: Overview / Stakeholders / Timeline / Risks / Deliverables / Lessons Learned
-
For learning/personal development: pages could have: Topic, Key Resources, Notes, Next Steps
-
For reference library: include summary, date bookmarked, link, personal comment — so you know why you added it
By building content deliberately, you avoid a wiki that’s full of half-written, unhelpful pages.
Step 5 – Organisation & discoverability
Beyond simply writing pages, you’ll want to enhance discoverability and keep the wiki usable:
-
Implement search metadata: tags, keywords, categories
-
Keep links clean: if your tool allows custom URLs, friendly titles help (e.g., “/process-onboarding” rather than “/page12345”)
-
Maintain an index/homepage: e.g., “Start Here”, “Glossary”, “Quick Links”
-
Use breadcrumbs and navigation aids so users see where they are (if tool supports it)
-
Create cross-section linking: A process page links to project page, which links to template page, which links to learning page, etc — this web of connections is what gives a wiki strength
Step 6 – Access, permissions & security
Especially if you’re using the wiki for team or semi-private content, you’ll need to manage access and security:
-
Define view vs edit rights: Some pages may be publicly viewable, some editing restricted
-
Protect sensitive pages: e.g., financial data, client info, proprietary procedures
-
Consider guest/external access if collaborating with outside parties, but limit what they see
-
Set up version history/backups: so you don’t lose data and can track changes
-
Consider audit logs if a team setting: useful to know who changed what and when
Step 7 – Review, update, maintain
A wiki isn’t a “set & forget” asset — it needs ongoing care to stay useful.
-
Assign owners: each page or category should have someone responsible for periodic review
-
Set up review cycles: e.g., every quarter someone checks “Are all project pages up-to-date?”
-
Archive or delete obsolete pages: if a process changes, move the old version to “Archive” rather than leave outdated info live
-
Monitor usage metrics (if the tool supports) or at least gather feedback: what pages are used, what aren’t, what users struggle to find
-
Encourage contributions: for team wikis encourage others to add/edit rather than have everything centralized to one person
-
Keep things usable and clean: prune redundancies, fix broken links, update templates
Example Use-Cases
Here are some realistic scenarios to illustrate how a wiki can be applied.
Project management hub
Instead of storing files, chat threads, spreadsheets in isolation, you create a wiki for each major project:
-
A project homepage with overview, timeline, roles.
-
Sub-pages: Kick-off, Execution, Deliverables, Post-mortem.
-
Links to template deliverables, meeting notes pages, documentation.
-
Team members know: “Go to the wiki” rather than “dig through emails”.
Process & SOP documentation
A wiki becomes the “company playbook” (even if it’s just you):
-
Pages for each key process (e.g., Onboarding, Sales, Marketing Campaign, Support)
-
Embedded forms or checklists if tool supports.
-
When change happens you update the wiki not send out a new PDF.
-
New joiners follow the wiki rather than rely on oral hand-over.
Personal development / learning centre
For individual use:
-
A category “Learning & Growth” with topics: Public Speaking, Data Analysis, French Language.
-
For each topic: resources page (books/articles/videos), notes/insights page, next steps page.
-
Track progress, link from “Goals” page: e.g., Goal “Data Analyst Certification 2026” → link to learning pages → link to project pages.
-
The wiki becomes your second brain: store what you learn, revisit what you bookmarked months ago.
Client or portfolio hub (for freelancers)
If you’re managing multiple clients:
-
A wiki page for each client hub: Background, Scope, Deliverables, Timeline, Contacts, Past Projects.
-
Meeting notes pages link back to client page.
-
Timeline of follow-ups and actions.
-
When you switch context it’s all in one place.
Knowledge library & idea incubator
Often we bookmark articles or save PDFs and forget later where they are. With a wiki:
-
Create a library category: Articles Worth Revisiting, Case Studies, Inspiration.
-
Tag each item with keywords, summarise in one-line why you saved it.
-
Link ideas to projects or learning pages.
-
When you brainstorm you have a “Creative Sparks” page with links to ideas, and can link that into projects.
Challenges & How to Overcome Them
Even with the best intentions, many wikis fail or get neglected. Here are the common pitfalls and how to address them.
Challenge: Low adoption / “too much extra work”
If people feel the wiki is an extra burden rather than integrated into workflow, they won’t use it.
Solutions:
-
Choose a tool with minimal friction (easy UI)
-
Embed the wiki usage into normal workflow: e.g., “After every meeting add notes to wiki”, “Use wiki instead of email for process updates”
-
Provide training or onboarding for users who aren’t tech-comfortable
-
Recognise and reward contributions
Challenge: Poor structure → becomes messy
If you just dump content without structure, the wiki becomes cluttered and hard to navigate.
Solutions:
-
Plan the architecture early (Step 2 above)
-
Use templates and consistent naming
-
Periodically prune and reorganise
-
Monitor pages not being used and archive or restructure
Challenge: Stale content / outdated information
If content is outdated, users will stop trusting the wiki and go back to old methods.
Solutions:
-
Assign ownership and review cycles
-
Use reminders (if tool supports) or calendar tasks
-
Archive old versions but keep accessible for history
-
Encourage culture of updating rather than “just adding once”
Challenge: Tool complexity / technical overhead
Using a self-hosted wiki or highly customisable tool may lead to maintenance burden.
Solutions:
-
Match tool to skill level and team size
-
For many small or personal uses, cloud tools are sufficient
-
If self-hosting, ensure you have the resources and processes (back-ups, versioning, security)
-
Avoid over-engineering: start simple, iterate later
Best Practices / Checklist
Here’s a practical checklist you can refer to when building and maintaining your wiki:
-
Define the purpose and audience of your wiki
-
List major content domains you’ll cover
-
Design the information architecture (categories/subpages/linking)
-
Choose the tool that fits your workflow and team
-
Set up workspace/site with navigation, templates, permissions
-
Create a home/dashboard page that acts as central starting point
-
Write the first high-value pages (kick-off) and use templates
-
Use linking, tags, metadata, search features
-
Define and assign ownership for each major section or page
-
Establish review/maintenance schedule (e.g., quarterly)
-
Monitor usage and gather feedback to adapt structure or content
-
Encourage a culture of contribution, collaboration and consistent upkeep
-
Archive or remove obsolete content — keep it clean
-
Periodically revisit whether the tool or approach still fits as you scale
Tool Recommendations & Quick Comparison
Here’s a simplified comparison of some of the tool options given earlier:
| Tool | Best for | Pros | Considerations |
|---|---|---|---|
| Notion | Personal use / small team | Very flexible, nested pages, templates | Might require discipline to keep structure |
| Slite | Team wiki / knowledge management | Built for wiki structure, templates, permissions | Cost (if team grows), less free-form than Notion |
| Nuclino | Simple team knowledge hub | Clean UI, linking, easy setup | Some advanced features may be missing |
| BookStack | Self-hosted wiki with structure | Strong hierarchy (“books/shelves”), open-source | Requires hosting, setup and maintenance |
| XWiki | Large enterprise / complex needs | Advanced features, scripting, strong permissions | More complex to set up and maintain |
| Zim | Desktop personal wiki offline | Local storage, private, minimal distraction | Not ideal for team/collaboration |
When choosing, ask: “Will I actually use and maintain this?” Because even the best tool fails if no one uses it.
Final Thoughts
Building a personal wiki isn’t just a productivity hack—it’s a strategic investment in how you organise and access knowledge. It becomes your second brain: the place where projects, learnings, references, and workflows converge.
Imagine walking into a meeting and quickly pulling up the exact document, client history, or learning note you need—without sifting through folders, emails or bookmarks. That’s the power of a well-designed wiki.
Begin with purpose, structure carefully, write clearly, and keep it alive. Embrace the small early wins (saving time, reducing chaos) and gradually expand. Over time, your wiki will pay off in clarity, speed, collaboration and less mental overhead.
If you’re ready to bring your scattered ideas and workflows into one organised space, now is the time to start your personal wiki. You’ll thank yourself later.
Read More: Why Shorter Deadlines Won’t Help You Overcome Parkinson’s Law