In today’s fast-paced work environment, tasks and responsibilities seem to multiply faster than we can check them off our to-do lists. Between meetings, shifting priorities, and digital distractions, staying on top of everything can feel overwhelming. But tracking your tasks effectively isn’t just a nice-to-have—it’s essential for reducing stress, improving clarity, and achieving your goals.
Below, you’ll find a deep dive into why tracking tasks matters, followed by 15 actionable strategies you can adopt to get better at it. Afterwards, we’ll walk step-by-step through how to implement a task-tracking workflow from scratch. Whether you’re a busy professional, a team lead, or someone juggling multiple roles, you’ll find tips here to upgrade your task-management game.
Why Task Tracking Matters
Before we dive into the how-to, it’s worth spending a bit of time understanding why tracking tasks is so important. When done well, it doesn’t just help you tick boxes—it changes how you work, how you think about work, and how you get results.
1. Increased productivity
When you track your tasks, you’re essentially bringing structure to what might otherwise be chaotic. Without tracking, many tasks float around in your head, you rely on memory or scattered notes, and you’re more likely to drop things or duplicate effort. By capturing tasks, monitoring them, checking them off, you reduce wasted time, minimize interruptions, and you free your mind from worrying “Did I forget something?”. This means you can spend more time doing rather than worrying.
2. Better alignment with goals
Tasks are the building-blocks of goals. If you have a high-level goal—say, increase sales by 20% this quarter—but you don’t track the tasks that contribute to that goal, you’ll lack visibility into real progress. Tracking tasks gives you the link between day-to-day work and the bigger objectives. It allows you to ask: Is what I’m doing right now moving the needle?
3. Improved time‐management
When you track tasks and record what you’ve committed to, you gain a clearer sense of how you’re spending your time. Are you spending too much time on low-value tasks? Are you constantly shifting between things and never finishing them? Tracking gives you data to make choices: amend your schedule, delegate, re-prioritize.
4. Enhanced accountability
When tasks are tracked—assigned, due-dated, visible—there’s far less ambiguity about who owns what and when it’s due. If you’re working solo, this still matters because you’re accountable to yourself; if you’re in a team, it matters even more because clarity around ownership prevents overlaps, omissions, and misunderstandings.
5. Visible progress boosts motivation
We humans like seeing progress. Tick off a task, mark something as done—there’s a small sense of achievement that helps maintain momentum. When you track tasks, you essentially turn abstract intentions into visible actions and outcomes. That energizes you.
6. Smarter decision-making
When your tasks are tracked you have a clearer view of your workload, your commitments, your dependencies and your progress. That means when a new request drops in, you can answer: Can I realistically absorb this? Which existing task should shift? You can make decisions rather than guess or procrastinate.
So: task-tracking is not a luxury or an after-thought. It’s foundational to productive, purposeful work.
15 Proven Tips to Keep Track of Your Work
Here’s a deeper dive into the strategies you can adopt to track your tasks more reliably and effectively. Each tip includes some “how” insight, not just “what”.
1. Set clear goals
Start by clarifying what you’re working toward. Without a goal, tasks drift.
Limit yourself: pick 2-3 key objectives each day that truly move the needle instead of dozens of minor things.
Make them SMART: Specific (“Write the Q3 marketing brief”), Measurable (“Complete draft and send for review”), Achievable (“I have all the data”), Relevant (“Supports our Q3 launch”), Time-bound (“By 3 pm today”).
Link tasks to these goals: Every task you track should map back to a goal. This builds meaning into even minor tasks and prevents busy-work.
Review your goals: At the start or end of each day (or week), ask “Which tasks truly supported those goals?” and “What tasks didn’t?”
2. Use a reliable task management system
The system you choose should match your workflow, scale with you, and enable clarity over time.
Pick something you’ll actually use (digital app, spreadsheet, paper planner) but ensure it can capture: task name, due date, assignee (if relevant), status, comments/notes.
Make sure notifications, reminders or alerts are possible so tasks don’t slip under the radar.
Look for features that support tracking: progress updates, view filters, ability to sort by status/priority, ability to review completed items.
Over time, assess the system: Are you capturing too much overhead or is it simple enough you maintain it daily?
3. Schedule everything in your calendar
Tasks + calendar = less chaos. Use your calendar not just for meetings, but for task time.
Time-blocking: Set specific blocks of time for tasks, not just “work on report” but “9:00-10:30 am: Draft Section 1 of report”.
Buffer time: Always include extra time between blocks so that overruns, transitions or unexpected interruptions don’t ruin your schedule.
Batch similar tasks: Group tasks that use similar skills or require similar context (e.g., “emails and admin” in one slot) to reduce context switching.
Prevent conflicts: Make sure your tasks don’t conflict with meetings or other obligations by checking your calendar before scheduling tasks.
Review weekly: At the start of each week, layout your big tasks, schedule time for them, adjust as things change.
4. Keep a to-do list
A to-do list is your “front line” for tracking. It doesn’t replace your calendar, but complements it.
Build your list at the end of each day for the next day (or first thing in the morning).
Include all tasks: major, minor, recurring, one-offs. Having them in one list reduces mental overhead.
Prioritize within the list: Mark items “High/Medium/Low” or use numbers to indicate order.
Update dynamically: As things come in, as things change, revisit the list. Cross off completed tasks or move tasks to next day’s list if incomplete.
Keep it visible: On your desk, on your screen, or in your app—so you glance at it often.
5. Set up reminders and automate where possible
Even the best list can fail if you forget to act. Reminders + automations increase your reliability.
Reminders: For tasks with deadlines, set an alert ahead of time (e.g., one day, one hour). For recurring tasks, schedule reminders in advance.
Automations: For repetitive tasks (weekly status update, monthly report), set up workflows that auto-create the task, notify people, update status. This reduces manual work and the risk of forgetting.
Review the reminders: If you always ignore a certain reminder, maybe the timing is wrong, or the task is mis-prioritized. Adjust accordingly.
Use different channels: Push notification, email, in-app alert—choose what you’ll respond to.
6. Prioritize based on effort and urgency
Tracking everything is good—but you can’t do everything first. Prioritization ensures you focus where it matters.
Use the Eisenhower Matrix:
Do: Urgent and important
Schedule: Important but not urgent
Delegate: Urgent but less important
Delete/Postpone: Neither urgent nor important
Another technique: Eat the frog—tackle your hardest/most disliked/highest-impact task first thing in the day, when your energy is highest.
Estimate effort: Small task vs big project. Big tasks may need breaking down (see next tip).
Don’t confuse “what’s urgent” with “what’s important”. Always ask: Does this task move my goals forward?
Update priorities: As new information arrives, you may need to re-shuffle what’s high/medium/low in your list.
7. Set due dates to avoid deadline chaos
Deadlines transform vague intentions into commitments. They help track orientation.
Assign a clear due date to each task—even if soft. Without a date, tasks tend to linger.
For larger projects, assign interim dates or milestones (e.g., “Section 1 due Monday”, “Review draft Wednesday”).
Display due dates in your calendar or task-system so you can view upcoming deadlines.
Use due-date notifications/reminders.
When a deadline passes and the task remains unfinished: review why. Did you mis-estimate? Is it dependent on something else? Is it priority change?
8. Break down large tasks into smaller subtasks
Large, vague tasks are hard to track—they hide progress and lead to procrastination.
For any big task (“Launch new marketing campaign”), identify the component pieces (“Write brief”, “Design banner”, “Plan schedule”, “Run test”, “Go live”).
Create these as separate subtasks each with their own due dates, owners (if applicable), and status.
Track the subtasks: Completion of each gives you feedback and maintains momentum.
Link them logically: Recognize dependencies (e.g., design can’t start until brief is done).
This breakdown also clarifies what “done” looks like, which supports better tracking.
9. Establish clear delegation and accountability chains
Whether you’re working alone or in a team, clarity around ownership is vital for tracking.
For each tracked task (or subtask), define: Who is responsible? Who is supporting? Who needs to be informed?
Make sure assignee(s) know: what they are doing, when it’s due, and the status.
In team settings: avoid multiple owners for the same task unless explicitly collaborative. A single “Accountable” party helps.
Use status updates to reflect progress (Not Started → In Progress → Review → Done).
Establish check-in routines: e.g., weekly review meetings, or status dashboards where you view who’s behind, which tasks are blocked.
10. Use labels, tags or categories to organize tasks
As your system grows, it’s easy for tasks to clutter up. Labels and categories help you filter and find what matters.
Use categories like: Project name, Client name, Type of work (e.g., “Research”, “Implementation”, “Admin”), Priority level.
Use tags or custom fields: For example “Urgent”, “High effort”, “Requires review”, “On hold” etc.
Build views or filters: e.g., show only “High priority & due this week” tasks; or show only “Tasks for Client X”.
Keep it consistent: Decide on a naming convention and stick with it. Otherwise, labels become messy.
Use the categorization not just for task-list management, but for tracking analytics: e.g., “How many ‘Research’ tasks did we complete this month?”
11. Use filters and search functionality to pinpoint tasks
When you have hundreds of tasks (or many people managing tasks), finding the right one quickly becomes a skill.
Make sure your system allows you to filter by status, assignee, due date, tag, priority.
Use search to find tasks by keyword. This is vital when you can’t remember if you created a task or what exactly it was called.
Build saved filters/views: e.g., “My overdue tasks,” “Team tasks due this week,” “High-impact tasks not started.”
Periodically check your filters: Are they catching the stuff you need? Are they still relevant?
This saves time and helps you stay on top of what matters, rather than drowning in everything.
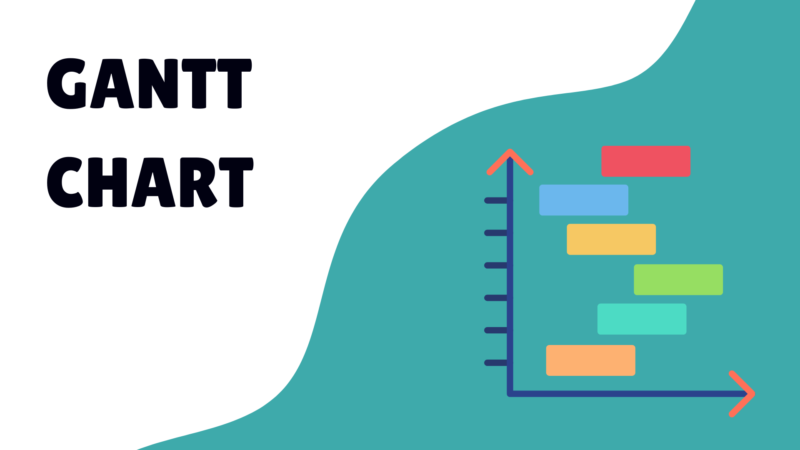
12. Create task dependencies to show relationships
Tasks rarely exist in isolation. Recognizing dependencies helps you track more intelligently.
Define in your system: Task B cannot start until Task A is complete.
Use built-in dependency features if your tool supports them: “Finish-to-Start” etc.
Visualize the dependency chain: Gantt charts, timelines, or simple linked tasks.
When a predecessor task is delayed, the dependent task is impacted—this gives you early warning.
In reviews, check for blocked tasks: If something is waiting on another’s completion, you can see and adjust schedule or resources.
13. Take advantage of comments, notes and task context
Tracking a task is not just saying “it’s done” or “it’s not done”—knowing how and why helps future tracking and clarity.
Within each task, include notes: what needs to be done, resources, links, instructions, background, relevant stakeholders.
Use comments or updates to log progress: e.g., “Met with design team — mockup complete, approval pending.”
Attach files, links, checklists—so that everything associated with the task is in one place.
Using this context means when you review tasks later you don’t have to dig through email or Slack to understand what happened.
It also helps in tracking because you can see delays, issues, decisions documented rather than relying on memory.
14. Minimize distractions
Even with a great tracking system, if you’re constantly being pulled off-task, your tracking will suffer.
Schedule focus blocks: Use your calendar to mark “do not disturb” time where you work on tasks without interruption.
Use techniques like Pomodoro (e.g., 25 mins work, 5 mins break) to structure your time and reduce fatigue.
Batch communication: Instead of reacting instantly to every chat/email, allocate specific times to check and respond.
Reduce tool-sprawl: If you manage tasks across too many apps, you’ll lose things. Consolidate or integrate.
Keep distractions visible: Use your task-system dashboard as your anchor, not notifications or inboxes.
15. Regularly review and refine your task list
Tracking isn’t a set-and-forget activity. It requires regular maintenance.
Daily reviews: At the end of your workday (or start of the next), look at your list: What’s done? What’s still pending? What needs to move?
Weekly reviews: Once a week, ask: Are the tasks I’m tracking aligned with my goals? Are some tasks obsolete? What’s upcoming next week?
Monthly or quarterly reviews: Look at patterns. What tasks are repeatedly delayed? Which categories consume the most time? Are goals being met?
Adjust your system: Remove low-value tasks, refine categories, adjust priorities or workflows.
Celebrate what’s complete, and retire tasks that you no longer need. This keeps your system uncluttered and meaningful.
![]()
Building Your Task-Tracking Workflow
Now that you have the tactics, let’s put them together into a practical workflow—step by step—from setup to ongoing maintenance. You can adapt it to your role (solo worker, small team, large team) but the structure remains broadly the same.
Step 1: Choose your tool or system
Decide whether you’re using a purely digital solution (task management software) or analog (paper planner) or a hybrid.
The criteria: It must allow you to capture tasks, assign due dates, assign priority, link to context/notes, and mark completion.
Make sure it can scale: You don’t want a tool that works for 10 tasks but breaks when you have 100 or when your team expands.
Ensure accessibility: You should be able to use it on your main devices (phone, laptop).
Setup: Create your initial workspace/lists/categories (for example: “Today”, “This Week”, “Backlog”, “On Hold”).
Train yourself: Make a small habit of checking the tool at the same time each day (e.g., morning and end of day).
Step 2: Define your workflows, to-dos and recurring tasks
Map out what you currently do: recurring tasks (daily check-in, weekly report), one-off tasks, projects.
For each workflow, define: What is the trigger? (e.g., Monday morning), What are the steps? (e.g., prepare report → review data → send).
Create templates for repeating workflows so you don’t re-build them each time.
Add these templates into your tool so each workflow becomes a task or set of tasks when triggered.
Assign ownership: Who executes each workflow? Who checks or reviews?
For each workflow, decide: How often? When due? What are the success criteria?
Step 3: Assign priorities
For each task, ask: What happens if I don’t do it today? What is the impact?
Label each task: High/Medium/Low priority, urgent vs important.
Use your prioritization techniques (see Tip 6).
At the start of the day, select your top 2-3 tasks—the ones you’ll commit to finish.
For the rest, ask: Could I delegate this? Could I delay it? Should I delete it?
Place top-priority tasks into your first time-blocks in the calendar (see next step).
Step 4: Time-block your day
Open your calendar. Block out periods for your high-priority tasks when your energy is highest (morning for many).
Insert buffer time: e.g., 15 minutes after each block for transition or unexpected.
Block administrative or low-focus tasks when your energy dips (afternoon, for example).
Include breaks: Even a 5-10 minute break after every focused block helps refresh.
Review the day: Ensure your schedule is realistic and reflects your task list.
At the beginning of the day: refer to your to-do list, pick tasks, and schedule them. At the end of the day: review progress and adjust next day’s schedule.
Step 5: Integrate your tasks and calendar
Ideally your tasks appear in your calendar (or at least you’ve blocked time for them) so you have one visualization: meetings + tasks.
If your tool allows, link tasks with calendar events (so when you schedule the task, it automatically shows in calendar).
Avoid double-bookings: Because your calendar now includes tasks, you will have fewer surprises.
Sync across devices: Ensure your task list and calendar stay in sync on your phone, laptop, etc.
Use colored blocks or tags in the calendar to differentiate “Task work” vs “Meeting” vs “Break”.
Step 6: Set up reminders and automations
For each task with a due date, set one or more reminders: e.g., 1 day before, 1 hour before.
For recurring tasks: set up automatic creation (if tool supports it) so you don’t have to recreate manually.
For status changes or approvals: automation can notify the relevant person when something is ready to review.
For dependencies: automation can trigger the next task once predecessor is complete.
Periodically review: Which reminders are helpful? Which feel like noise? Adjust the cadence so they are meaningful, not overwhelming.
Step 7: Break down big projects
When you identify a large task (or “project”), create a master task (“Parent task”) and then create several subtasks underneath it.
For each sub-task: define what needs to happen, assign the owner, set a due date.
Link subtasks logically so that you can track progress and dependencies.
Use the parent task’s progress bar (if tool has one) so you can see % complete.
Regularly monitor subtasks: If many subtasks are pending, you know the project is behind even if the master task is still “In Progress”.
Step 8: Assign ownership and accountability
For each task or subtask: assign a single clear owner (“who’s doing this”).
If there are supporting people, note them (“CC” or “support role”).
Set expected due date and expected output/definition of done.
In team settings: hold regular check-ins. E.g., “Which tasks are blocked? Who needs help?”
Use status updates: owner marks “In Progress”, “Waiting Review”, “Complete”. This gives visibility.
Make sure responsibility is transparent: others know who to go to if there’s a question.
Step 9: Organize tasks with labels, tags and filters
Set up your categories/tags: e.g., by project, by client, by type of work (Research, Writing, Design, Admin).
Assign each task the relevant tag(s).
Create filtered views: For example, one view shows only “High priority tasks due this week”. Another view shows “My tasks by client”.
Use color-coding if possible: Makes scanning faster.
Periodically review your tagging system: Are there redundant tags? Are some tags unused? Clean up the system to keep it efficient.
Step 10: Add context and comments
In each task: add a description that explains what needs to be done, how, and why. Include links, files, resources.
Use comments or thread updates to log what’s happened. Example: “10/29: Draft sent to design, awaiting review from Jake.”
Use checklists within tasks where helpful (e.g., sub-items that all belong to this task).
When you hit a block or receive feedback, log it in the task comment rather than external chat. This keeps the history in one place.
During your reviews (daily/weekly) scan the comments: Are there items overdue? Are there blocked notes? This helps tracking not just whether tasks are done, but how they’re progressing.
Step 11: Maintain focus by removing distractions
Use your time-blocks and task list as your anchor: when in a “task block”, refrain from checking unrelated apps or switching contexts.
Mute or disable non-critical notifications while working on a task.
Use physical or digital cues: a “do not disturb” sign, a status update in your chat tool.
Batch lower-value tasks (e.g., responding to non-urgent emails) into one time slot, instead of interrupting focus time.
Review your system: If you notice many tasks were derailed by interruptions, adapt your schedule or environment to protect focus.
Step 12: Daily (or weekly) review and refine
Daily: At the end of each day, open your task list.
Mark completed tasks.
Move unfinished tasks: if they still matter, carry them to tomorrow; if they don’t, delete or postpone.
Review what tasks are due soon. Adjust your schedule for tomorrow accordingly.
Weekly: At the end of the week:
Review all tasks completed, still pending, or deferred.
Analyze time usage: were you spending your time where you intended?
Remove or archive tasks you no longer need.
Plan for next week: set your key objectives (see Tip 1), pick your top tasks, schedule them.
Monthly/Quarterly:
Look for patterns: Which tasks repeatedly get delayed? Which categories dominate your list?
Evaluate your goals: Are they still relevant? Are tasks aligned?
Adjust workflows, templates, templates, or your tracking system to improve efficiency.
Final Thoughts
Tracking your tasks is more than just keeping a list—it’s about building clarity, visibility, alignment and momentum. When your tasks are visible, prioritized, structured and reviewed, you shift from reacting to working intentionally.
Here are a few closing recommendations to help you make this stick:
Start small: pick 3 of the tips above and commit to them for the next week (for example: set clear goals; time-block your day; do a daily review). Once they become habit, add more.
Be consistent: The system is only useful if you use it—and re-use it.
Adapt to your style: Everyone’s workflow is different. Use the principles above but adjust the details to fit how you work best.
Use data: Over time you’ll see what tasks take longest, which categories you spend most time in, which tasks always get deferred. Use that insight to improve.
Reflect: Your system should evolve as your work does—new tools, new projects, new team members may require tweaks. Regularly refine.
You now have a detailed roadmap—from goals to tools to workflows—to set yourself up for better task-tracking. When your tasks are organized, visible and action-oriented, you’ll find yourself more productive, less stressed and better aligned with your work.
Read More: How to Enhance Project Quality Management: Tools and Strategies