Managing social media content can quickly become overwhelming—especially when you’re juggling multiple platforms, design assets, and posting schedules. Canva aims to simplify that entire workflow with its built-in Content Planner, a feature that lets you design, schedule, and publish posts all in one place. Whether you’re a small business owner, social media manager, or content creator, the Canva Content Planner helps streamline the process, save time, and maintain brand consistency without switching between multiple tools.
In this guide, you’ll learn exactly how the planner works, what it can do, and how to use it step-by-step to organize and automate your social media content effortlessly.
What Is the Canva Content Planner?
The Canva Content Planner is a scheduling tool inside Canva that allows users to plan, organize, and publish social media content directly to various platforms. Instead of designing in Canva and then downloading files to upload elsewhere, the planner integrates creation and scheduling into a single workflow.
It functions like a visual calendar where you can:
Create posts using Canva’s templates
Drag and drop designs onto specific days
Schedule content across Facebook, Instagram, LinkedIn, Pinterest, X (Twitter), TikTok, and more
Preview your scheduled posts in a calendar view
Edit or reschedule content at any time
For creators and teams who already use Canva for graphics, the Content Planner acts as a seamless extension—turning Canva into a full content creation and scheduling hub.
Key Features of Canva Content Planner

The Canva Content Planner comes packed with intuitive, time-saving features designed to help individuals and teams manage social media content more efficiently. Here are the key features that make it a powerful tool for creators and marketers:
1. Visual Calendar Interface
The planner displays your upcoming posts in a clean drag-and-drop calendar view, allowing you to easily map out weekly and monthly content. You can quickly move posts around, spot gaps in your schedule, and maintain a consistent publishing rhythm.
2. Direct Scheduling to Multiple Platforms
Canva supports scheduling to major social platforms such as:
Facebook Pages & Groups
Instagram Business accounts
LinkedIn Profiles & Pages
Pinterest
X (Twitter)
TikTok
Google Business Profile
This eliminates the need for third-party schedulers if your brand relies heavily on Canva for visuals.
3. Built-In Content Creation Tools
Because the planner is integrated inside Canva, you can create, edit, and update designs instantly. No switching tabs or downloading media files—everything happens inside one workspace.
4. Post Drafting & Caption Editor
Add captions, hashtags, emojis, and links directly in the planner. You can also save drafts for future editing.
5. Brand Kit Integration
For Canva Pro users, the Brand Kit syncs with your planner to ensure every scheduled post uses the correct logos, colors, and fonts.
6. Multi-Platform Preview
See how your post will look on each social channel before scheduling it. This helps ensure proper formatting and prevents awkward cropping.
7. Team Collaboration Features
Teams can leave comments, share designs, assign tasks, and collaborate on scheduling in real time—ideal for agencies and marketing departments.
8. Content Management Tools
You can duplicate posts, reuse templates, organize designs into folders, and manage publishing dates and times—all from a single dashboard.
Benefits of Using Canva for Content Planning
Using Canva as a centralized content creation and scheduling hub offers several advantages for marketers, businesses, and creators.
1. Saves Time and Increases Productivity
Instead of jumping between multiple tools for design, scheduling, and publishing, Canva lets you complete everything in one platform. This dramatically cuts down on workflow complexity.
2. Ensures Consistent Branding Across All Posts
With templates, brand kits, and shared assets, your content remains visually consistent. This is especially beneficial for businesses aiming to maintain a strong, recognizable brand presence.
3. Simplifies the Content Creation Workflow
Canva reduces the number of steps required to get a post live—from ideation and designing to scheduling and publishing. This streamlined process means fewer errors and faster content turnaround.
4. Improves Team Collaboration
Collaborators can work together on designs, provide feedback, and align on posting schedules without needing external communication tools. Everything stays centralized.
5. Helps Maintain a Strategic Posting Schedule
The calendar view makes it easy to plan content around campaigns, seasonal events, or product launches. You can see your full strategy at a glance and avoid last-minute scrambling.
6. Reduces the Need for Third-Party Tools
For creators and small businesses, Canva’s built-in planner may eliminate the need for separate scheduling apps—saving money on software subscriptions.
7. Ideal for Both Beginners and Advanced Users
Canva’s interface is user-friendly, making it accessible even for those without design or technical expertise. Yet it still provides enough features for professional marketers to manage a full content pipeline.
How to Use Canva Content Planner (Step-by-Step)
The Canva Content Planner makes social media scheduling more intuitive by combining design creation and publishing into one seamless workflow. Below is a detailed, up-to-date walkthrough on how to use it effectively.
Step 1: Open the Content Planner

Once you’re logged into Canva, navigate to the left-hand sidebar of your dashboard. You’ll find an option labeled “Planner”. Clicking this opens a monthly calendar view where you can visualize your entire posting schedule.
Inside the planner, you can:
Scroll through past or upcoming months
Click any date to begin scheduling
Preview all previously scheduled or drafted posts
Drag and drop designs to reschedule them
This calendar-based view helps you structure your weekly or monthly content strategy without switching between different tools.
Step 2: Connect Your Social Media Accounts

To schedule posts directly from Canva, you need to link your social accounts. You can do this either from the Planner or from Account Settings under “Connected Apps.”
Supported platforms typically include:
Instagram Business accounts
Facebook Pages & Groups
LinkedIn Profiles and Company Pages
Pinterest accounts
X (Twitter)
TikTok
Google Business Profile
When connecting an account, Canva will request permission to publish content on your behalf. Make sure you connect the correct business profiles and verify that you have the required admin or editor permissions on those accounts.
Once connected, the platform appears in your scheduling menu, allowing you to publish directly without downloading or uploading files elsewhere.
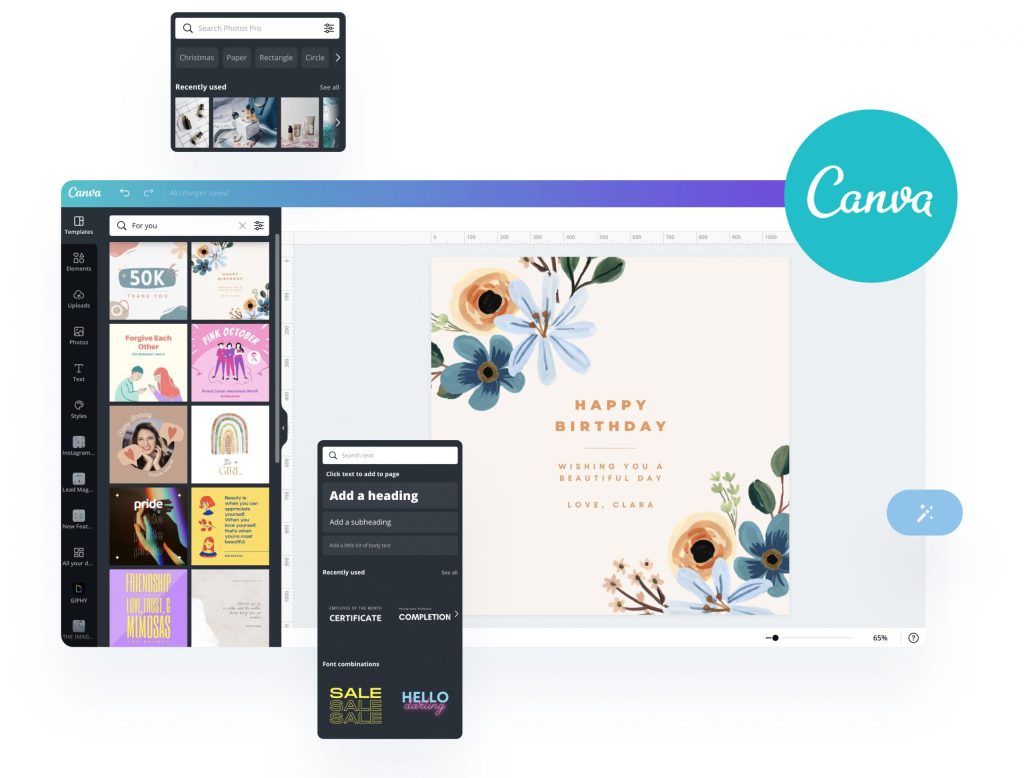
Step 3: Choose or Create Your Design
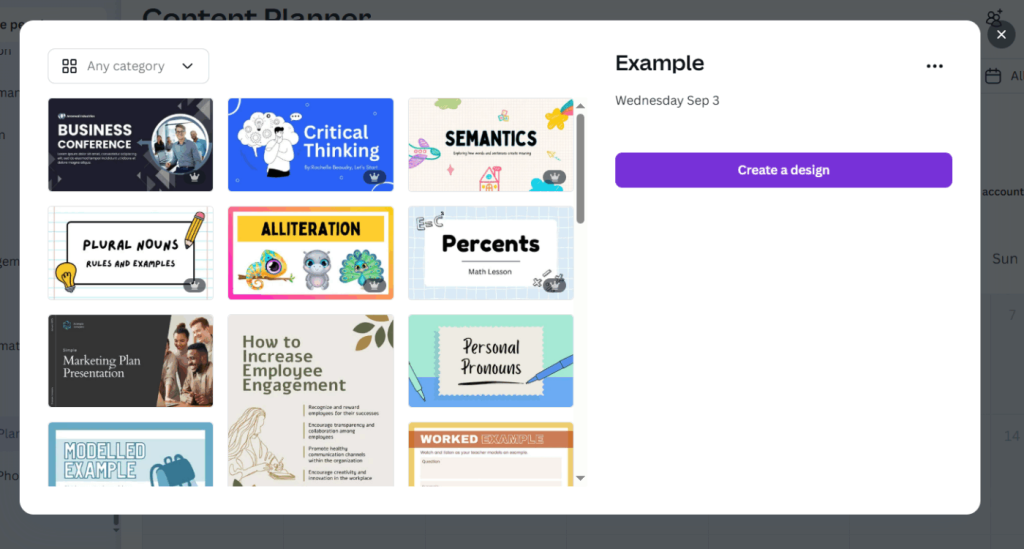
When you click a date in the planner or start a new scheduled post, Canva will give you the option to either:
Create a new design from scratch,
Choose from thousands of templates, or
Use an existing design from your folders or recent projects.
If you choose to create a new design, you’ll be taken to the Canva editor where you can customize every element—text, images, animations, colors, layout, and branding.
Key tools in the design editor include:
Access to your Brand Kit (for Canva Pro users)
Drag-and-drop elements
Photo, video, and audio libraries
AI tools like Magic Media or Magic Write (depending on availability)
Once the design is ready, click “Share” and select “Schedule” to proceed.
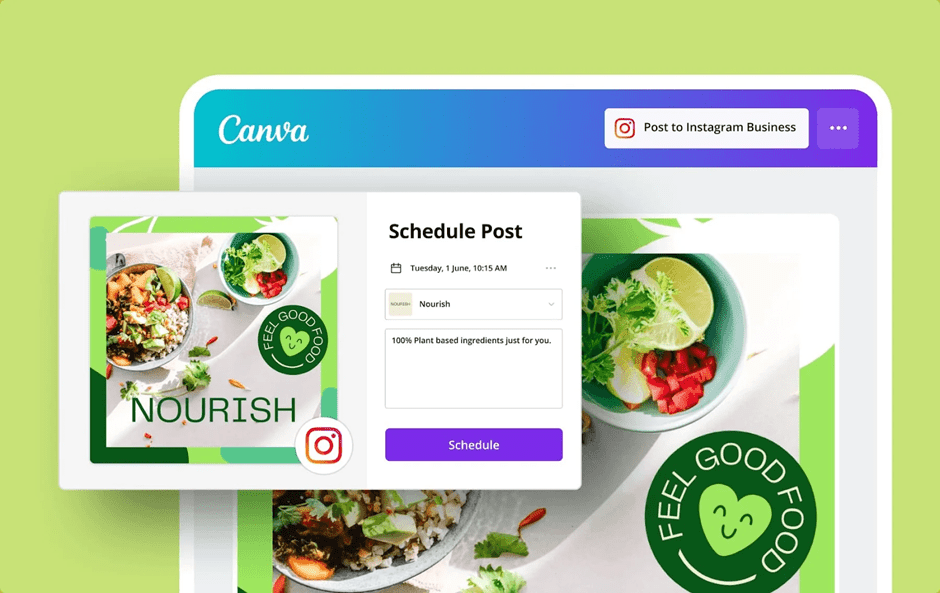
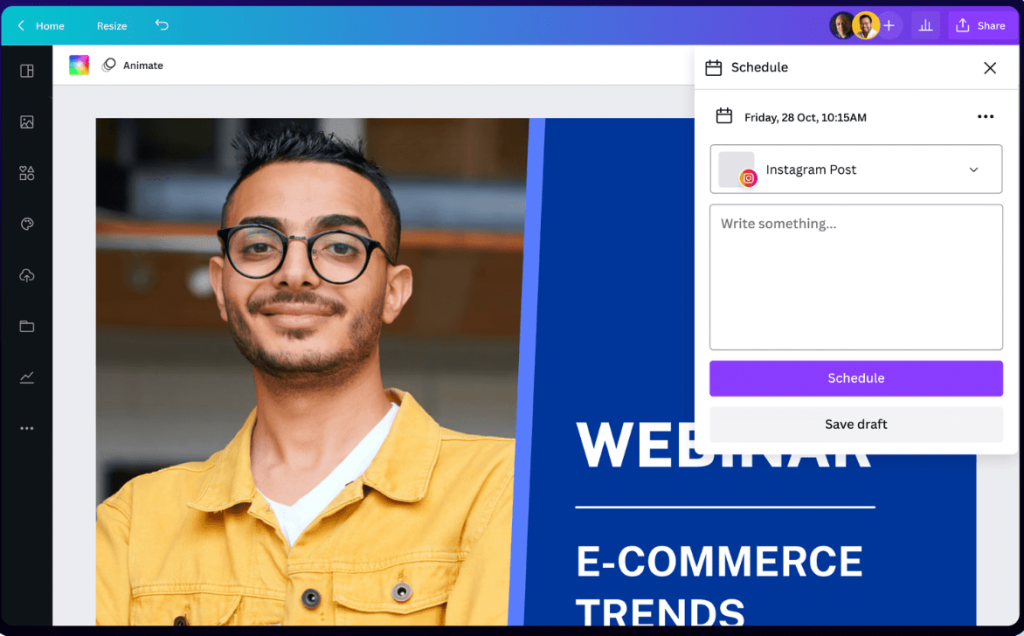
Step 4: Add Your Caption and Schedule

A scheduling window will appear, allowing you to prepare your post for publishing.
In this panel, you can:
Select the specific social media channel you want to publish to
Add your caption, including text, links, hashtags, tags, or emojis
Choose the exact date and time based on your audience’s peak engagement
Upload multiple pages of a design (if the platform supports carousel or multi-image posts)
Preview how the post will look on the selected platform
If you’re posting to multiple accounts, you’ll schedule each platform individually to ensure the formatting is correct for each one.
Once everything looks good, click “Schedule”. Canva will automatically place your post into the calendar on your selected day and time.
Step 5: Manage and Edit Scheduled Posts

After scheduling, your post will appear as a thumbnail inside the Planner. From here, you can manage it easily:
Click on a scheduled post to open it
Edit your caption, change the scheduled time, or update the design
Reschedule by dragging the post to a different date
Duplicate posts for reuse across other platforms or campaigns
Delete posts that are no longer needed
If Canva encounters any publishing errors—such as an expired login or revoked permission—you’ll see an alert in your planner. Simply reconnect the affected account to fix the issue.
The planner also allows you to filter posts by social platform, making it easier to review your distribution strategy and ensure consistency across all channels.
Canva Content Planner Pricing and Availability
The Canva Content Planner is available to all Canva users, but certain features—especially those that relate to enhanced branding, collaboration, and expanded publishing options—are more accessible with Canva Pro.
Here’s how availability breaks down:
Free Plan
Cost: $0 per month
Includes basic design tools, 5 GB storage, and access to the content planner with limited features.
Canva Pro (Individual)
Monthly: approx. $12.99 per month
Annual (billed yearly): approx. $120 per year (around $10 per month)
Includes premium features: access to 100 million+ premium assets, 100 GB cloud storage, advanced editing tools, Brand Kits, and full content scheduling capabilities.
Canva Business (replacing Teams for new subscribers)
Monthly: approx. $20 per person per month
No minimum seat requirement (new plan replaces Teams for new sign-ups).
Offers all Pro features plus advanced brand controls, deeper analytics, team collaboration tools, and enhanced AI.
Canva Enterprise
Pricing: Custom / contact sales
Enterprise plans include SSO, advanced governance, custom integrations, dedicated support, and larger storage.
Notes on Teams vs Business:
Canva has updated its offerings — Canva for Teams is no longer offered to new customers and has been replaced by the Canva Business plan. Existing Teams subscribers retain access to their current plan.
Regional Pricing Variations
Prices may be lower in some regions due to local pricing adjustments. For example, Canva Pro prices in countries like India are often around ₹499/month.
Who Should Upgrade to Canva Pro?
Upgrading to Canva Pro is most beneficial for:
Social Media Managers
They need fast access to premium templates, brand consistency tools, and advanced editing features to maintain high-quality content across several platforms.
Small Business Owners
Pro tools make it easier to build a recognizable brand. Features like Brand Kits, premium design assets, and automatic resizing save time and improve professionalism.
Content Creators and Influencers
Creators who publish consistently benefit from the ability to schedule posts, repurpose designs for multiple platforms, and access a larger library of visuals.
Marketing Teams
Teams that plan content collaboratively will benefit from shared folders, approval workflows, and unified brand assets.
Agencies Handling Multiple Clients
The ability to manage brand elements, templates, and scheduled posts all in one place simplifies client management and reduces dependence on outside tools.
Tips for Maximizing Canva’s Content Planner
1. Batch Creating and Scheduling Content
Preparing multiple posts in one sitting helps maintain consistency and saves considerable time. Start by brainstorming content themes for the week or month, then design all related visuals together. This approach boosts efficiency and reduces the stress of last-minute content creation. Once designed, schedule them all in your Content Planner so you can focus on engagement instead of daily publishing tasks.
2. Using Canva Templates for Consistency
Templates provide a visual foundation that keeps your content cohesive across platforms. Canva offers templates for various categories—social media posts, reels, ads, carousels, and more. Save your frequently used templates in folders so you can quickly update them for new campaigns. This ensures your branding remains instantly recognizable without recreating designs from scratch.
3. Leveraging Analytics from Connected Platforms
While Canva itself doesn’t provide in-depth analytics, the platforms you publish to do. After scheduling posts, check engagement, reach, and interactions directly from your social accounts. Use this information to adjust your future designs, posting times, or messaging. For example, if analytics show higher engagement at certain times, schedule future posts accordingly.
4. Collaborating with Team Members
If you’re managing content with others, assign roles, share designs, and request feedback through Canva’s collaboration tools. Team members can leave comments, make edits, and help manage the content calendar. This is especially useful for agencies and social teams that need a streamlined approval workflow. Using shared Brand Kits also ensures everyone publishes content that aligns with brand guidelines.
Limitations of Canva Content Planner
While the Canva Content Planner is a powerful and convenient tool for social media scheduling—especially for users who already design in Canva—it does have some limitations to be aware of before relying on it as your sole publishing solution.
1. Limited Analytics Inside Canva
Canva does not provide in-depth performance analytics for your scheduled posts. Once a post is published, you must rely on each social platform’s native insights (e.g., Instagram Insights, Facebook Analytics) to track engagement, reach, and audience behavior. This means you cannot view detailed performance metrics directly within Canva.
2. Platform Restrictions and Publishing Limitations
Some social platforms have restrictions that affect how posts are published via Canva. For example:
Certain post types (like Instagram Stories or Reels) may not be directly supported or may require extra steps.
Features like tagging other users, location tagging, or link placement can be limited depending on the platform’s API.
These restrictions are platform-dependent and can change when those platforms update their publishing rules.
3. Fewer Advanced Scheduling Features
Compared with dedicated social media management tools, Canva’s scheduler lacks some advanced capabilities such as:
Bulk upload and scheduling via CSV or spreadsheet
Automated reposting of evergreen content
Suggested optimal posting times based on historical engagement data
Deep social listening and hashtag performance insights
For larger social teams or agencies, these advanced features may be critical.
4. Collaboration May Be Less Robust for Large Teams
While Canva supports team collaboration, its workflow tools are more basic compared with project management platforms. For example:
Comments and approvals are limited to design assets, not entire campaign threads.
There’s no built-in task assignment or advanced approval workflow outside of design comments.
Teams that need robust project coordination may still require external tools like Asana, Trello, or Slack.
5. Dependent on Platform API Availability
Canva’s ability to post directly to social platforms depends on the platform’s API permissions. If a platform restricts API posting, Canva cannot schedule or auto-publish content there. In some cases, you may need manual posting or push notifications rather than fully automated publishing.
6. Limited Multi-Account Analytics and Insights
Although you can connect multiple social accounts, Canva does not provide unified analytics dashboards that show cross-platform performance in a single place. For consolidated reporting or comparative performance analysis, you’ll need a dedicated analytics tool or native platform insights.
Overall, the Canva Content Planner is ideal for users who value simplicity and integration with design tools. However, if your social strategy requires advanced analytics, bulk scheduling, or enterprise-grade collaboration, you may need to supplement it with specialized social media management software.
Canva Content Planner Alternatives
If you’re looking for tools beyond Canva Content Planner—especially solutions with deeper scheduling, analytics, team collaboration, and campaign management capabilities—here’s a detailed look at some of the best alternatives available today.
1. Corexta

Corexta is an all-in-one business management platform designed to help agencies and teams manage not just social media content, but entire business operations from a single dashboard. While it isn’t solely a social scheduler like Canva or Hootsuite, it includes calendar and campaign tools that enable planning and organizing content alongside broader project and client workflows.
Calendar and Campaign Tools
Corexta provides visual calendar tools that help teams schedule and organize tasks, content, and client deliverables. This is useful if you want your social planning to tie directly into wider business calendars and milestones.
End-to-end Project Management with Campaign Tools
Rather than only publishing posts, Corexta integrates task tracking, project timelines, and client management alongside content workflows. This means your social campaigns can be tied to specific project goals, budget tracking, deadlines, and team assignments.
AI-powered Support for Social Teams
Although not exclusively a social tool, Corexta’s automation features and analytics dashboards help teams monitor performance metrics and workflows, allowing social media planning to align with overall business insights.
Manage and Track Social Media KPIs with Dashboards
Integrated dashboards within Corexta consolidate data from different functions—including content schedules—so teams can track key performance indicators (KPIs) and adjust strategies based on real performance insights.
Overall, Corexta suits agencies or growing businesses that want to blend content planning with broader project, HR, client, and finance workflows rather than manage social posts in isolation.
2. Buffer

Buffer is a simple yet effective social media management tool popular among individual creators, small businesses, and early-stage teams. It focuses on easy scheduling and content queuing across multiple platforms like Instagram, Facebook, LinkedIn, TikTok, Pinterest, and X.
Key strengths of Buffer include its queue-based scheduling, intuitive calendar view, and basic analytics that help you track engagement trends. It offers a forever-free plan with support for a limited number of accounts, with paid tiers available for more extensive use.
Buffer’s straightforward interface and transparent pricing make it a great choice for solopreneurs and small teams who want a no-frills scheduling solution without needing complex campaign management.
3. Hootsuite

Hootsuite is one of the most comprehensive social media management platforms available. It’s built to support larger teams and enterprise needs with advanced scheduling, analytics, social listening, and engagement features.
Unlike basic schedulers, Hootsuite brings a unified inbox to manage comments and messages across platforms, bulk scheduling, and the ability to track paid ad performance alongside organic posts. Its analytics and reporting tools are more robust than those in most simpler tools, helping marketers make data-driven decisions.
While Hootsuite’s pricing tends to be higher than entry-level tools, the depth of features and scalability makes it suitable for medium to large teams, agencies, or brands with a heavy social presence.
4. Later

Later started as a visual planner especially for Instagram but has expanded to include scheduling for TikTok, Facebook, Pinterest, and more. Its standout feature is the visual content calendar, which lets you preview your grid and plan for visual consistency—a big plus for lifestyle, fashion, and food brands.
Later also includes features like Linkin.bio (turning posts into clickable landing pages), media libraries, and basic analytics. While its platform support beyond Instagram and TikTok is somewhat limited compared to Hootsuite or Buffer, Later excels for businesses that prioritize feed aesthetics and visual planning.
These alternatives offer different strengths depending on your needs
Corexta is ideal for agencies that want all-in-one business workflow and content coordination, not just social scheduling.
Buffer suits those who want simple, affordable scheduling without complexity.
Hootsuite works best for teams needing advanced analytics, listening, and engagement tools.
Later is perfect for creators and brands focused on visual content planning and aesthetics.
Level Up Your Content Planning with Corexta
If you want to take your content planning beyond simple scheduling and move into full workflow optimization, Corexta offers a powerful upgrade. Unlike traditional social media planners, Corexta combines campaign management, content scheduling, KPI tracking, and team collaboration into one unified platform—giving you complete visibility into your marketing operations.
With Corexta, you can manage entire campaigns from start to finish, assign tasks to team members, track progress in real time, and keep your social content aligned with broader marketing goals. Its campaign dashboards and KPI tracking tools make it easier to analyze performance, identify gaps, and make data-driven decisions. This means your team stays organized, your content stays consistent, and your strategy stays on track.
Whether you’re growing your brand or managing multiple clients, Corexta helps you streamline your workflow, stay ahead of deadlines, and boost the efficiency of your entire content ecosystem.
Ready to elevate your content planning? Start organizing smarter, streamline your workflow, and unlock more productivity with Corexta today.